
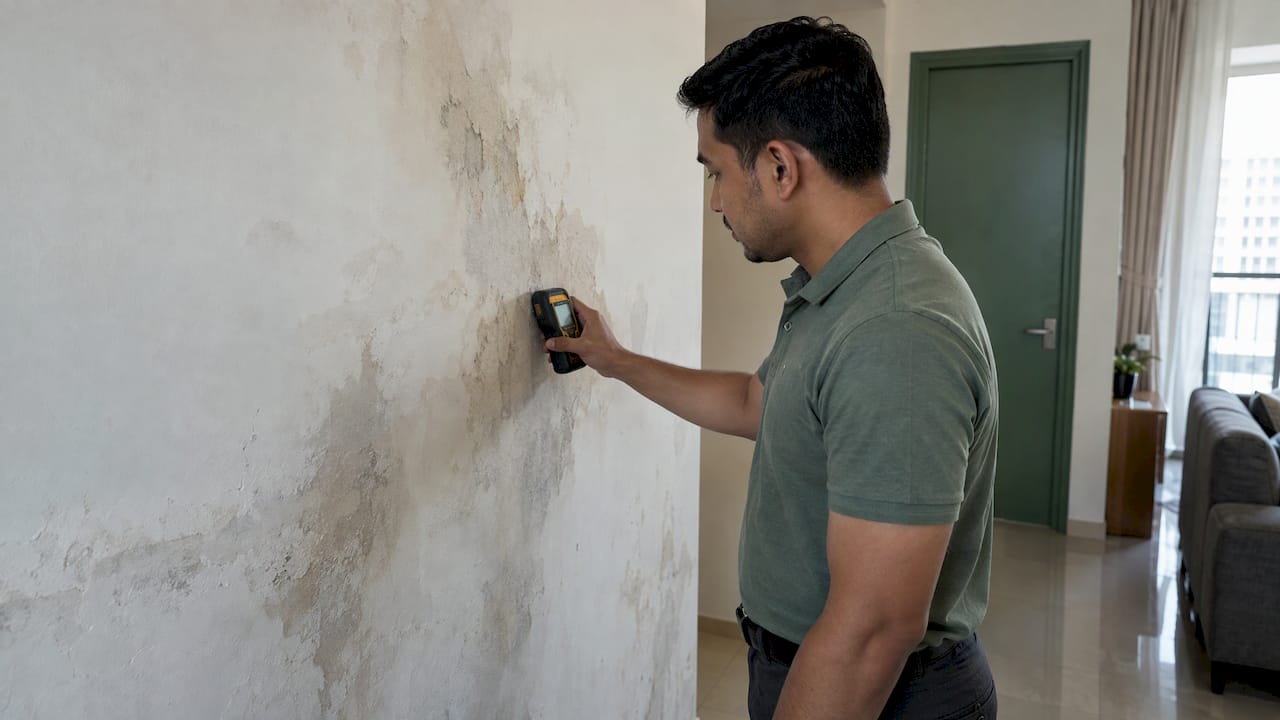
A water ingress investigation is a structured engineering exercise that identifies where water enters a building, by which path and for what reason, and records the finding in a report that supports a repair decision. For developers, building owners and contractors in Singapore, the value lies in the sequence: a documented desk study, a systematic site survey, instrument-based testing, verification by a second test and a written conclusion that separates observation from root cause. Aman Engineering Consultancy carries out building inspections and Periodic Façade Inspection (PFI) works through its Professional Engineers, and the method below is the one that determines whether a repair addresses the cause or only the stain.
TL;DR
- Water appears where the path ends, not where it begins. A stain on a ceiling or a window head is evidence of a path, and the entry point may lie metres away and at a higher level.
- A sound investigation runs in five stages: appraisal and desk study, detailed site survey, analysis, verification by further tests, and a written report.
- No single instrument settles a diagnosis. Moisture meters, thermal scans, water tests and pressure tests each establish one fact, and the conclusion comes from combining them.
- The report must be evidence-based: weather, methods, test results, causes, limitations and recommended remedial actions, so that the repair can be specified and procured.
- Singapore’s waterproofing standard, SS 637:2018, requires a 24-hour ponding test for waterproofing, which is the benchmark against which wet-area failures are judged.
Table of Contents
- What a water ingress investigation establishes
- Where water enters: the sources an investigator considers
- The five stages of a professional investigation
- Instruments and tests, and what each one establishes
- Distinguishing rainwater, plumbing and membrane failure
- What the investigation report must contain
- From findings to rectification
- How Aman supports an investigation
- Perspective
- FAQ
- Sources
What a water ingress investigation establishes
Water ingress means water entering a building envelope or structure from outside, or migrating from one part of the building to another, in a way the design did not intend. The investigation answers four questions in order: is water present and how much, what is its source, what path does it take, and which building element has failed to stop it.
The Singapore context raises the stakes. SS 637:2018, the Code of Practice for waterproofing of reinforced concrete buildings, states that components prone to seepage must be protected against rainwater penetration and ingress under local conditions of high humidity and heavy rainfall. The code covers basements, floors, walls, roofs and precast elements, with or without hydrostatic pressure. Any element in that list can be the point of failure, which is why an investigation cannot begin with an assumption about the cause.
The consequences are practical. Persistent moisture damages finishes, corrodes embedded reinforcement and fixings, disrupts electrical installations and raises disputes between owners, tenants, contractors and management bodies about responsibility. A diagnosis that rests on measurements and a recorded method is the document those disputes are settled on.
Where water enters: the sources an investigator considers
The investigator does not assume rain. The moisture control guidance of the US Environmental Protection Agency identifies rain, groundwater and surface runoff, plumbing water and wet materials enclosed during construction as the main sources of water in buildings, and notes that small plumbing leaks inside walls and ceiling cavities can continue unnoticed for some time. These categories translate directly to Singapore building types.
| Source | Typical locations | What makes it difficult |
|---|---|---|
| Rainwater through the envelope | Roofs, parapets, façade joints, window and door perimeters, cladding interfaces | Leaks often occur during wind-driven rain, so they may not repeat on a dry day |
| Plumbing and drainage | Risers, pipe sleeves, concealed branches, rainwater downpipes, sprinkler lines | A slow leak inside a cavity can run for a long period before a stain appears |
| Wet-area waterproofing failure | Bathrooms, kitchens, planter boxes, balconies, pantries in commercial floors | The membrane is hidden under screed and tiles, and failure shows on the floor below |
| Groundwater and surface water | Basements, lift pits, retaining walls, ERSS permanent walls, car park ramps | Hydrostatic pressure drives water through joints, cracks and penetrations |
| Construction moisture | New slabs, screeds, enclosed finishes | Moisture trapped during construction is released over time and mimics a leak |
The BCxA Building Commissioning Association observes that exterior-precipitation leaks are the most common and often the most expensive type, and that water appearing at a window may not originate from the wall above it, while water at the base of a wall may originate from the roof. The practical rule for a project team is that the location of the visible damage is a starting point for the survey and never the conclusion.
For basement and retaining-wall situations, groundwater chemistry and durability are a separate design matter, covered in our note on durability design for permanent ERSS walls in aggressive groundwater.
The five stages of a professional investigation
The Hong Kong Institute of Surveyors publishes a professional guide to water seepage that recommends a five-stage approach, supported by a standard investigation kit, an inspection checklist and a reporting template. The guide originates in Hong Kong, but the physics of water movement and the discipline of the sequence apply equally to Singapore’s high-rise, humid and rainy conditions. The stages are set out below with what each requires and where each commonly goes wrong.

1. General appraisal, desk study and planning
The desk study collects the documents that explain the building before anyone enters it: maintenance manuals, record plans, defect and repair histories, complaints and any earlier test reports. The purpose is to learn what has already been tried. A wet-area that has been re-tiled twice without a membrane test, for example, narrows the hypotheses before the first measurement.
The common failure at this stage is skipping it. Without drawings, the investigator cannot trace where a riser, a sleeve or a movement joint sits relative to the stain, and the survey becomes guesswork.
2. Detailed on-site survey
The site visit inspects the affected areas, interviews the complainant about frequency, duration, symptoms and timing, uses diagnostic equipment, visits adjacent units or common areas where appropriate, checks pipes and fittings, and notes other possible causes. The interview carries real diagnostic weight. A leak that appears only after heavy afternoon rain points to the envelope, one that appears after showers points to a wet area, and a constant one points to pressurised plumbing.
Measurements are taken systematically. The HKIS guide advises that moisture readings be taken on a grid and recorded on a standardised proforma, so that a damp pattern can be drawn rather than described.
3. Analysis of survey findings
The findings are compared against the building’s construction. The investigator plots readings on the floor plan, identifies the pattern (a point, a line along a joint, a diffuse zone below a wet area) and ranks the candidate sources. Water can travel, so the highest-probability source is often upstream of the highest reading.
4. Verification and confirmation by further tests
A hypothesis is only a hypothesis until a second, independent test supports it. Verification may be a dye test, a flood or ponding test, a hose test or a pressure test, depending on the suspected source. This stage is where many informal diagnoses fail: a contractor identifies a likely crack, seals it and leaves without proving it was the path.
5. Report preparation
The report records the evidence and conclusion. Its contents are set out in a later section, because the report is the deliverable that the owner, the management body and the repair contractor all work from.
Instruments and tests, and what each one establishes
Each technique answers a specific question. Using one in isolation and treating its result as a diagnosis is the most common methodological error.
| Technique | What it establishes | Limits to note |
|---|---|---|
| Electrical moisture meter | Relative moisture level at a point. The pin type reads to about 3 mm, the pinless dielectric type to about 20 mm | Surface-depth readings only. Best as a quick first scan and a basis for a grid |
| Infrared thermography | Comparative moisture mapping without contact | Unsuitable for metals and tiles, and results depend on conditions |
| Fluorescent dye test | Confirms a connection between a suspected entry point and a visible outlet | Requires access to the suspected source |
| Flood or ponding test | Whether a waterproofed horizontal area holds water | Needs a defined duration and a controlled area |
| Hose (water) test | Whether a façade or roof element admits water when wetted | Applied in sections, starting low and working up, to isolate the path |
| Pressure test | A pressure drop indicates a pipe leak | Applies to pressurised pipework only |
| CCTV pipe inspection | Condition of drainage lines | Applies to drainage and soil pipes |
The HKIS guide elaborates five commonly used non-destructive tests: the fluorescent dye test, rapid infrared thermographic scan, electrical moisture meter, leak tracing and microwave leakage detection, and tabulates 13 technologies in total, including CCTV pipe inspection, radar, nuclear moisture meters and ultrasonic sound sensors. The depth figures in the table above come from the same guide.
The ponding test has a Singapore-specific requirement. The 2018 revision of SS 637 extended the ponding test from 12 hours to 24 hours, and added a waterproofing system datasheet, water-table and sub-surface drainage considerations and good practices for external-wall waterproofing. An investigation of a wet-area or roof failure should state which ponding duration was applied and why.

For façades, water testing sits within the periodic inspection regime. Our note on Singapore PFI façade water testing explains how visual inspection and close-range work divide on a typical building.
Distinguishing rainwater, plumbing and membrane failure
The three most frequent diagnoses require different evidence.
Rainwater penetration. Building Science Corporation’s diagnostic guidance (BSD-108) advises starting at the wet spot and working backwards and upwards, noting that water can run horizontally over long distances and that wind can drive it uphill over sills and flashings. When it is not raining, a garden hose misting the surface lets gravity do the work, and interior exhaust fans can simulate wind-driven rain. The test sequence matters: wet the lowest suspected element first, then move upward, so that a leak is not credited to a higher element that was never the entry point. Teams that need to understand how to test an envelope for rain entry can read about testing for rainwater ingress in a related door-threshold context.
Plumbing leaks. The BCxA notes that interior plumbing leaks are often the easiest to diagnose because the path from source to visible appearance is short, whereas enclosure leaks from precipitation follow a long and indirect path. A pressure drop in an isolated line, or leakage that persists in dry weather, points here.
Waterproofing or membrane failure. The evidence is a damp pattern beneath a wet area that correlates with water use above, confirmed by a ponding test. SS 637:2018 stresses that applying a waterproofing system requires extreme care and strict adherence to manufacturer procedures, that poor workmanship produces leaks that are difficult and costly to repair, and that a competent applicator should carry out the works with inspection before and after barrier installation. The investigation therefore also asks whether those inspections were done at construction.
What the investigation report must contain
The report is the instrument by which the findings become a repair scope. The HKIS guide states that it must be evidence-based and typically includes the following:
- Executive summary and building description.
- Inspection dates and the number of attempts, with the names, posts and qualifications of the surveyors.
- Weather conditions during the work.
- Methodology and equipment used.
- Findings, including the type, extent and seriousness of each defect.
- Test summaries, with details appended.
- Analysis of causes and a conclusion.
- Limitations of the investigation.
- Recommendations and remedial actions.
- Location plans, annotated floor plans, damp patterns, photographs, calibration certificates and laboratory reports where applicable.
Two qualities distinguish a useful report from a descriptive one. First, it separates what was observed from what is concluded as the root cause. Second, it states plainly where certainty requires further opening-up works, rather than presenting a probable cause as a proven one. An owner who receives a report with these features can instruct a contractor against a defined scope and can show a counterparty, whether a developer, a management body or an insurer, the evidence on which the scope rests.
From findings to rectification
A report with recommendations leads to one of three outcomes: a local repair, an element replacement such as re-waterproofing a wet area or roof, or a wider rectification programme. For wet areas, the Building and Construction Authority’s Good Industry Practices guide on waterproofing for internal wet areas covers design, material selection, preparation works, installation, protection of works and a dedicated section on defects and rectification, and is the reference a repair specification can follow.
For building owners with façades subject to periodic inspection, ingress findings feed into the broader inspection record. Our guides on façade inspection requirements in Singapore and what triggers a periodic façade inspection set out when that obligation arises. Where a project is large enough to need coordinated programme, cost and rectification control, project management and quantity surveying keep the repair scope, the tender and the final account aligned with the report.
A sequence that works for project teams:
- Commission the investigation before any repair, so that the repair addresses the proven path.
- Require the report in the structure above, with test summaries appended.
- Specify the rectification from the report’s recommendations, citing SS 637:2018 where waterproofing is involved.
- Re-test after the works, using the same method that confirmed the original defect.
How Aman supports an investigation
Aman Engineering Consultancy provides real estate inspection through Professional Engineers, together with Periodic Structural Inspection, Periodic Façade Inspection and façade rectification works (PFI Stage 2) for Singapore buildings. Our positioning is single-point statutory coordination with a multidisciplinary PE team and integrated drone inspection capability, which allows elevated façade and roof areas to be surveyed from one coordinated engagement. Owners and developers who need an investigation, a report and the rectification works managed under one team can start from the Aman Engineering Consultancy site.

Where the investigation leads to inspection obligations or authority submissions, the authority approvals service handles the statutory route.
Perspective
Water ingress cases that return after repair share one feature: the repair was specified before the path was proven. A sealant bead applied at the stain, a screed re-laid over an untested membrane, a coating on a wall whose entry point was a parapet two floors above, each treats the symptom.
We therefore treat the investigation as an engineering deliverable with its own method and its own evidence. Our Professional Engineers work from the building’s records, survey on a grid, test the hypothesis by a second method and report the limits of what has been proven. Where a building is high, drone inspection allows the façade and roof to be examined without delay for access arrangements.
For an owner or developer, the practical benefit of engaging one multidisciplinary team is continuity. The same engineers who diagnose the defect can coordinate the structural, façade and statutory implications, specify the rectification and verify it afterwards, so that responsibility for the outcome does not pass between parties.
Aman
FAQ
How long does a water ingress investigation take?
Duration depends on the building, the access available and the tests required. A desk study and site survey can be completed quickly, but a ponding test under SS 637:2018 requires 24 hours on its own, and rainwater cases may need to wait for suitable weather. The report timeline is agreed at the start of the engagement.
Why does water appear far from where it enters?
Water moves along slabs, beams, joints and cavities before it becomes visible. Building Science Corporation notes that it can run horizontally over long distances and that wind can blow it uphill over sills and flashings. For that reason, the investigator starts at the wet spot and works backwards and upwards.
Is a moisture meter reading enough to diagnose a leak?
No. A moisture meter shows relative moisture at a point and to a limited depth, roughly 3 mm for a pin type and up to 20 mm for a pinless dielectric type. It guides where to test next, and the diagnosis is confirmed by a water, ponding, dye or pressure test.
What should the report give the building owner?
It should give the methods, weather and equipment, the findings and test results, an analysis of cause with limitations, and recommended remedial actions with plans and photographs. That allows the owner to specify the repair and to show the evidence to other parties.
Sources
- SS 637:2018 Code of Practice for waterproofing of reinforced concrete buildings (preview)
- EPA: Moisture Control Guidance for Building Design, Construction and Maintenance
- BCxA: Building Leaks Can Lurk in Many Corners
- HKIS: Professional Guide to Water Seepage
- Building Science Corporation: Investigating and Diagnosing Moisture Problems (BSD-108)
- BCA: Good Industry Practices, Waterproofing for Internal Wet Areas